User guide
Every feature, step by step.
The screenshots below are the real app. Work through a section when you need it — each one stands on its own.
Getting started
BizYangu signs the business in once with your phone number. After that, everyone who works on the phone gets their own name and PIN.
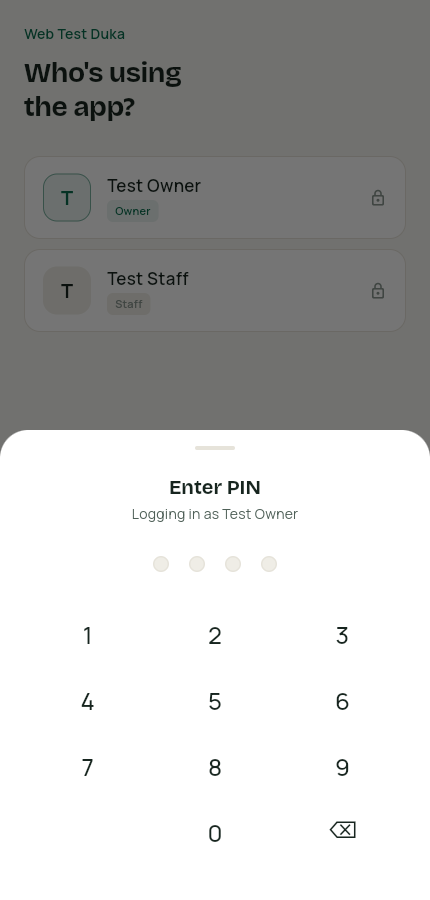
Sign in with your PIN
- Open BizYangu. The "Who's using the app?" screen lists everyone on this phone.
- Tap your name.
- Enter your 4-digit PIN on the pad. The app opens on your dashboard.
Each staff member has their own PIN, so every sale is recorded under the person who made it.
Read the dashboard
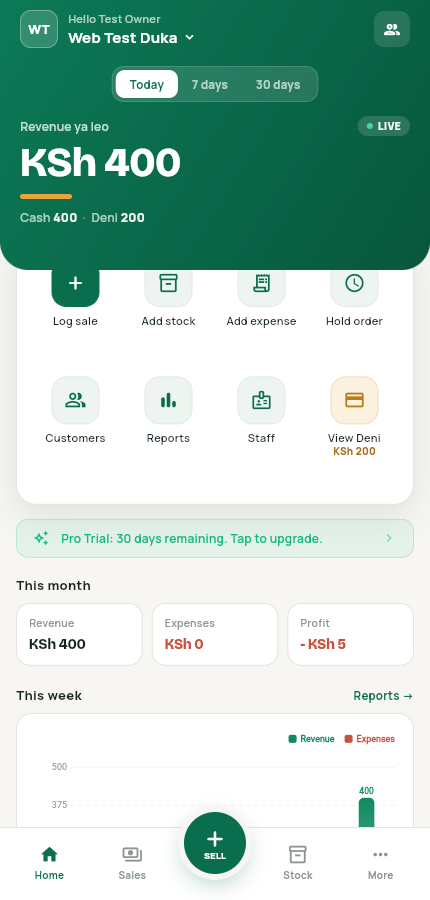
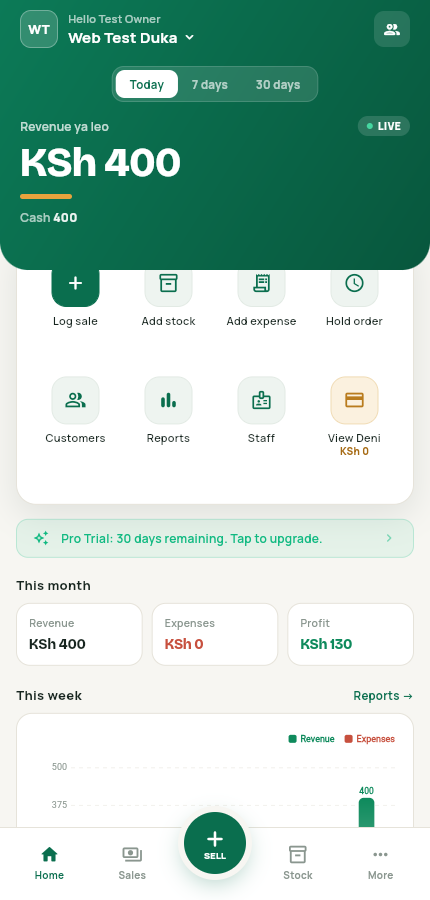
- The green header shows Revenue ya leo — today's money — with the split by Cash, M-Pesa, Card and Deni beneath it.
- Switch the header between Today, 7 days and 30 days with the buttons at the top.
- The quick-action grid takes you straight to logging a sale, adding stock, adding an expense, holding an order, customers, reports, staff and deni.
- This month shows Revenue, Expenses and Profit side by side.
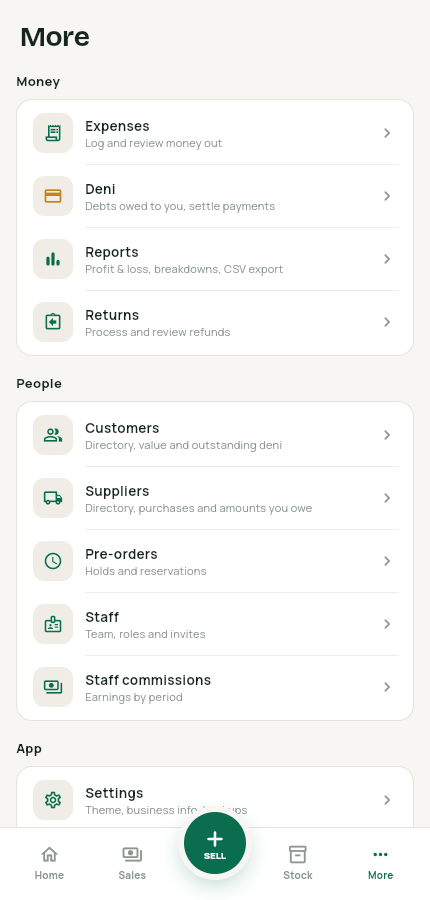
Find everything else in More
- The bottom bar has Home, Sales, SELL, Stock and More.
- Tap More for Expenses, Deni, Reports, Returns, Customers, Suppliers, Pre-orders, Staff, Staff commissions and Settings.
Selling
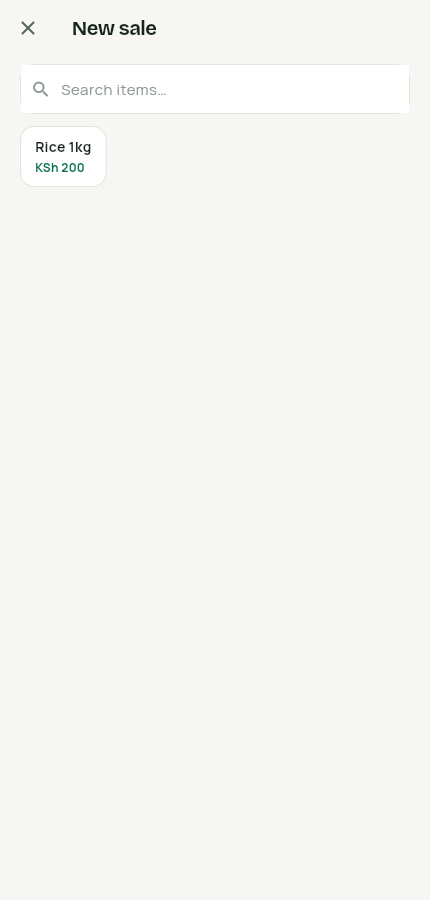
The big green SELL button in the middle of the bottom bar is always one tap away.
Log a sale
- Tap SELL. Your items appear as chips — tap one to add it to the cart, or search by name.
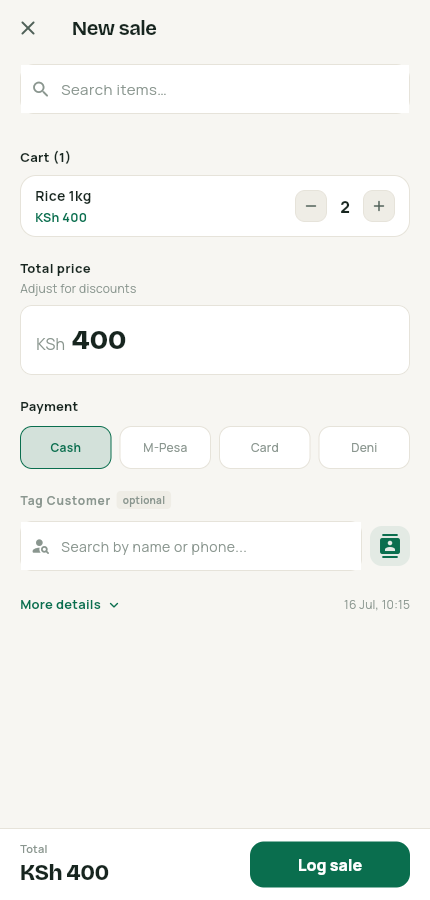
- Adjust the quantity with the + / − buttons. The total updates as you go, and you can edit it for a discount.
- Pick the payment: Cash, M-Pesa, Card or Deni.
- Optionally tag the customer by name or phone.
- Tap Log sale. Stock and today's revenue update immediately.
Share the receipt
- Go to the Sales tab and tap any sale.
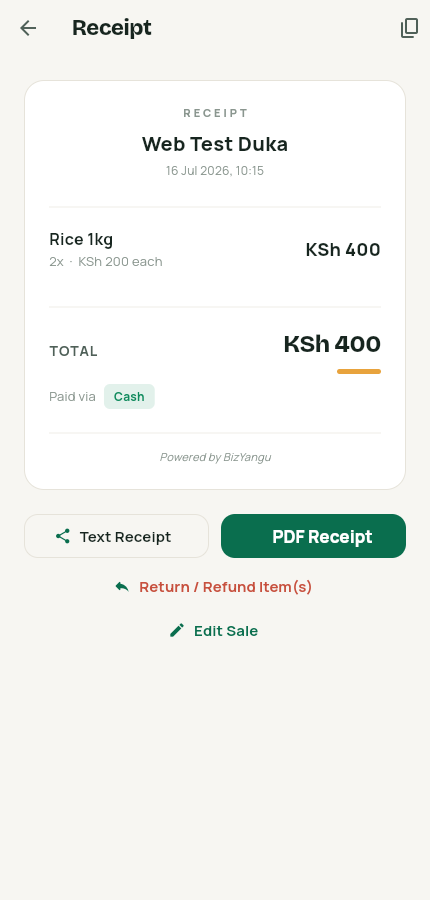
- The receipt shows the items, total and how it was paid.
- Send it with Text Receipt or PDF Receipt. You can also start a return or edit the sale from here.
Review the day
- The dashboard header updates the moment a sale is logged.
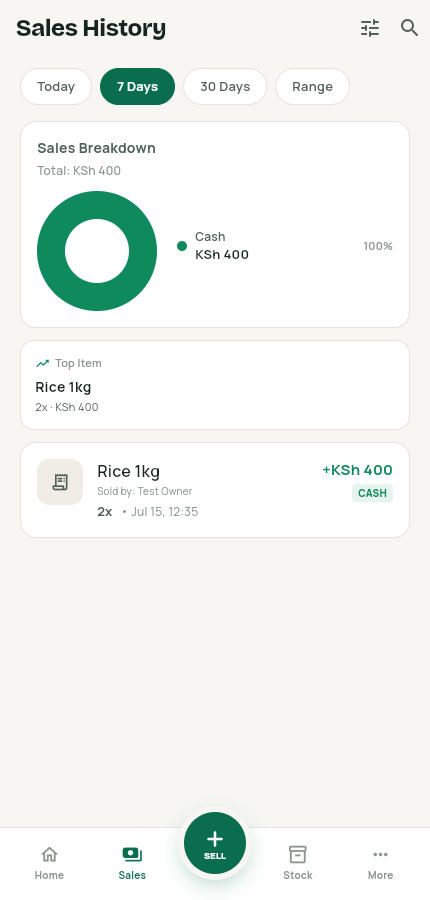
- The Sales tab shows the payment-mode donut, the top item and every sale — filter by Today, 7 Days, 30 Days or a date range.
Inventory
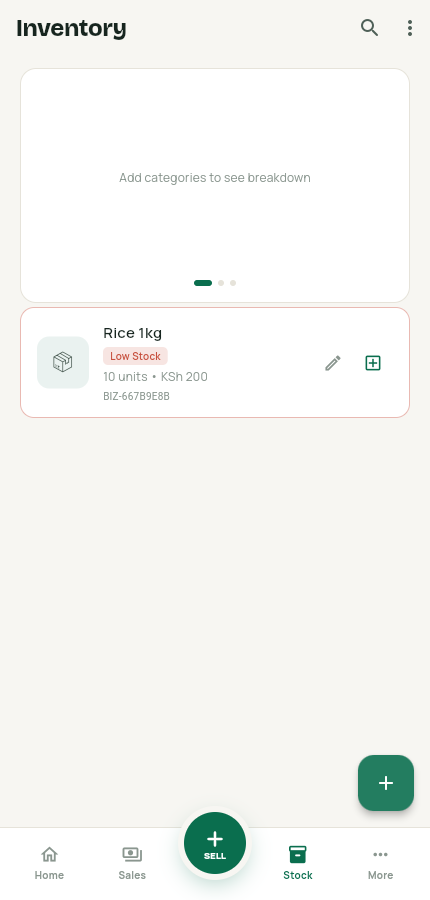
The Stock tab is your shelf on the phone: items, quantities, prices and low-stock warnings.
Add an item
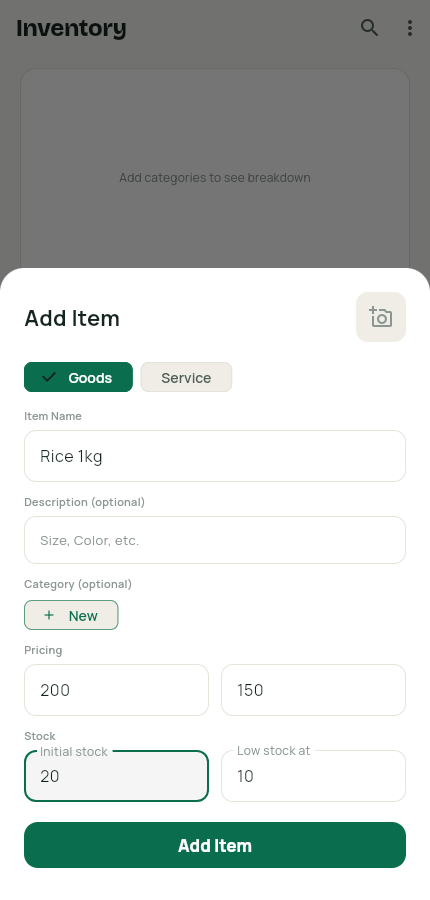
- On the Stock tab, tap the + button.
- Choose Goods or Service, then enter the name.
- Enter the selling price and the cost price — the cost price is what profit is calculated from.
- Set the initial stock and, if you like, the low-stock warning level and a photo.
- Tap Add Item. A barcode is generated automatically.
Restock an item
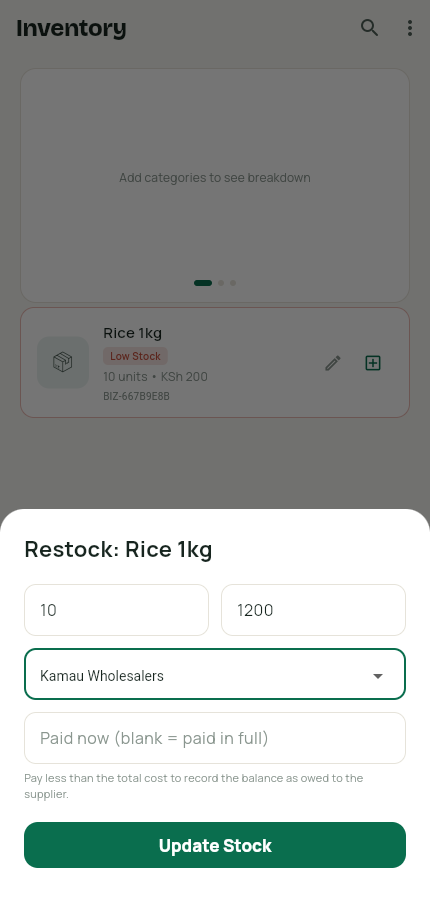
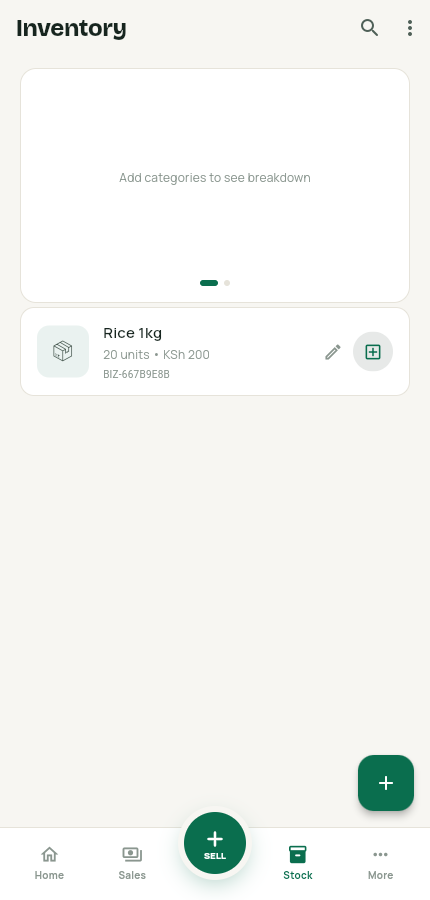
- Tap the restock icon on the item's card.
- Enter the quantity you bought and the total cost of the restock.
- Optionally pick the supplier. If you paid less than the total, enter the paid now amount — the balance is recorded as owed to that supplier.
- Tap Update Stock.
Restock costs feed the weighted-average item cost, which keeps your profit figures honest.
Suppliers
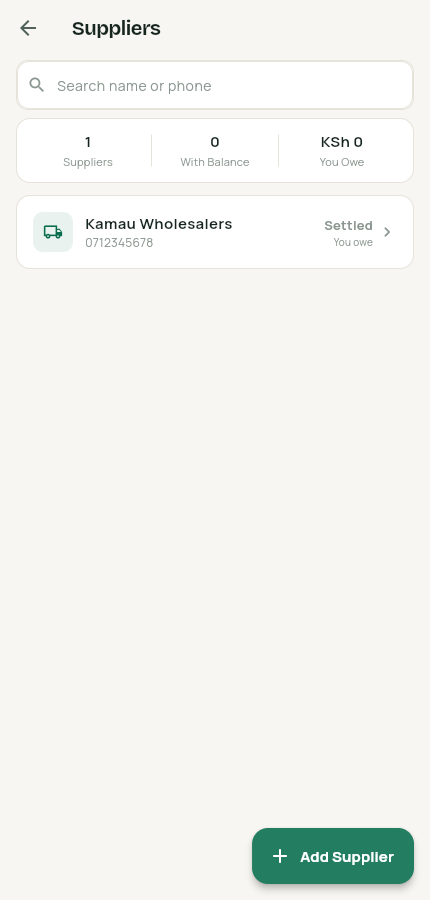
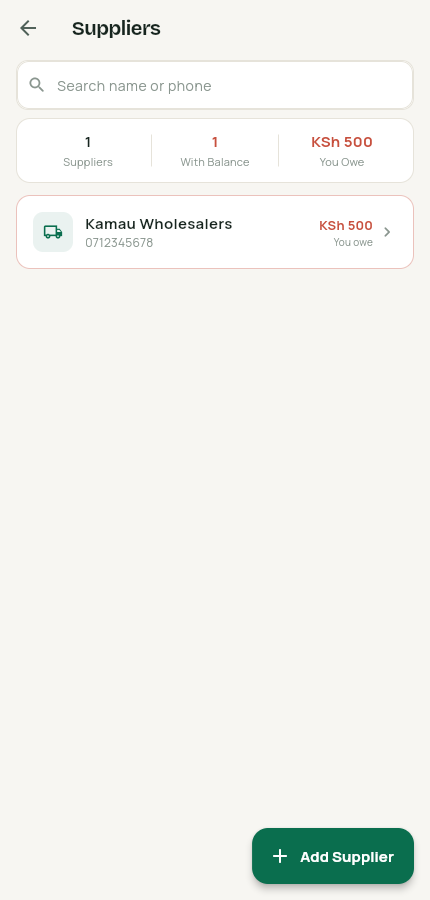
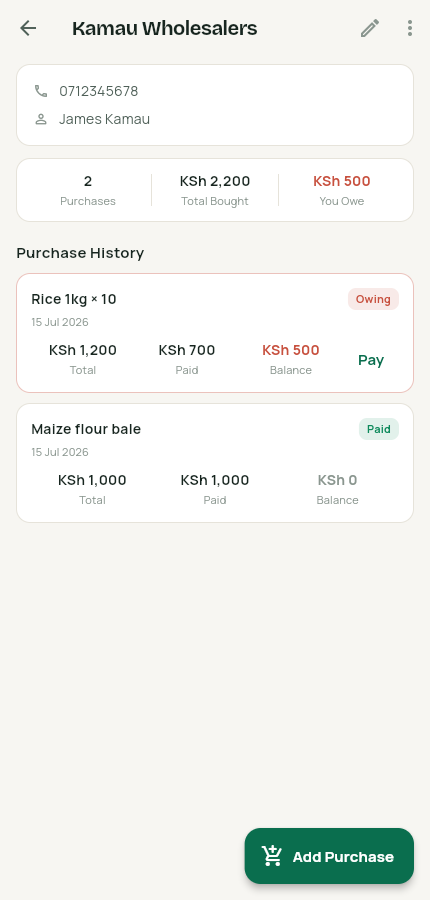
Suppliers are the mirror of deni: instead of who owes you, it's who you owe. Find them under More → Suppliers.
Add a supplier
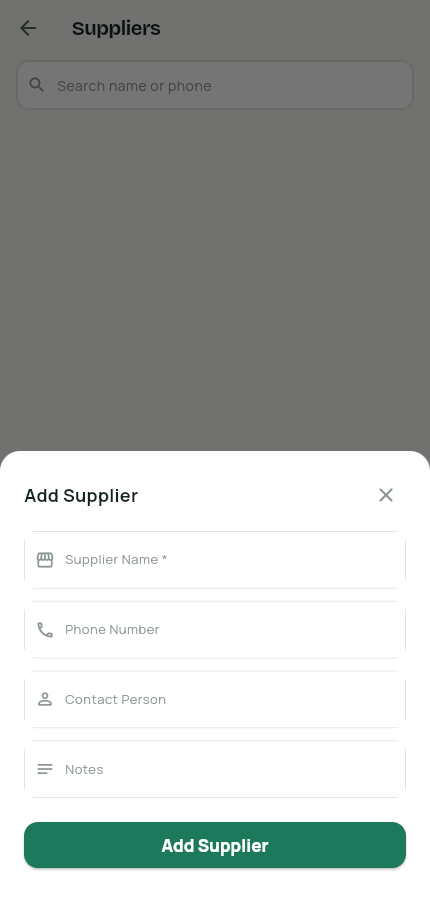
- Go to More → Suppliers and tap Add Supplier.
- Enter the supplier's name — phone, contact person and notes are optional.
- Tap Add Supplier. The directory shows every supplier with what you owe at a glance.
Record a purchase on credit
- Open the supplier and tap Add Purchase.
- Describe what you bought and enter the total cost.
- Enter what you paid now — leave it blank if you paid in full.
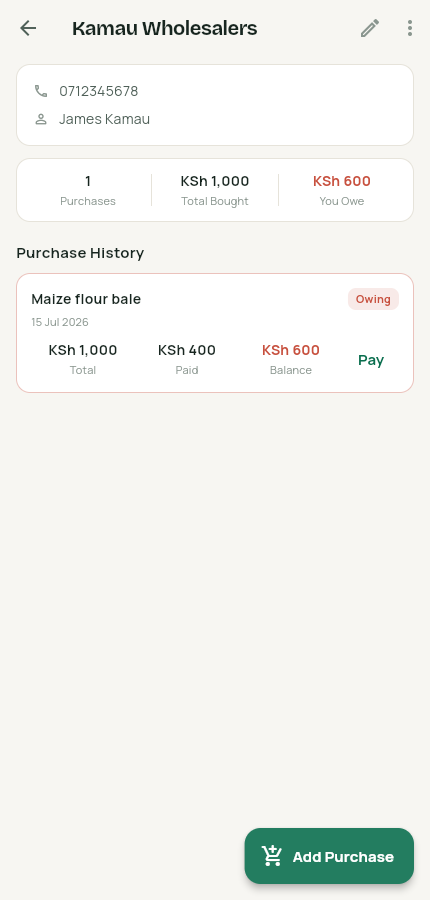
- Tap Save Purchase. Anything unpaid shows as an Owing balance.
Restocks made from the Stock tab with a supplier attached appear in this history automatically.
Pay off a balance
- Tap Pay on the purchase card.
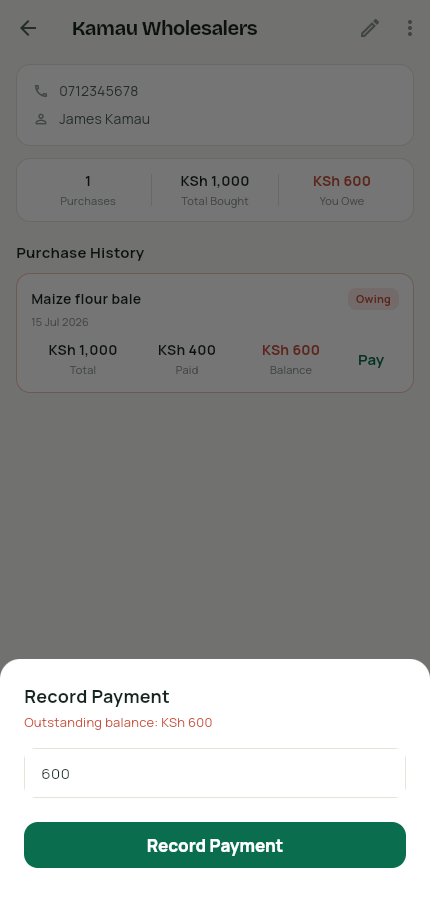
- The amount field is prefilled with the outstanding balance — lower it for a part-payment.
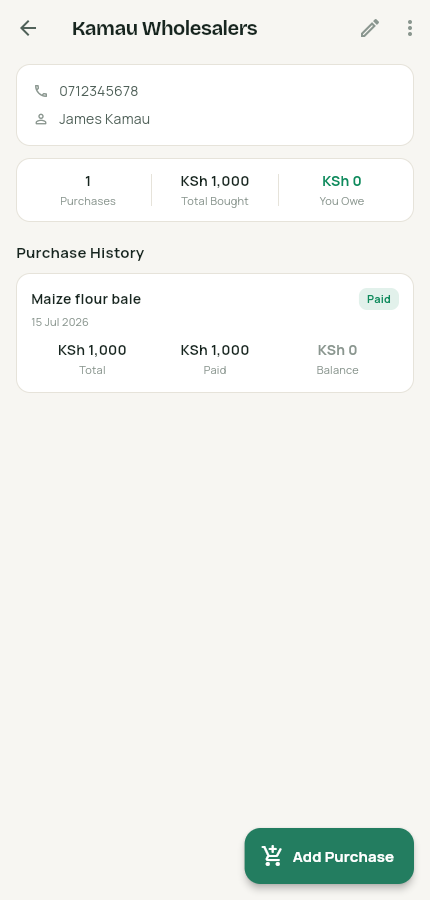
- Tap Record Payment. When the balance hits zero the purchase flips to Paid.
Keep an eye on what you owe
- The suppliers list totals You Owe across all suppliers.
- Each supplier's page shows purchases, total bought and the running balance.
Customers & Deni
Deni is debt with a name on it. A deni sale must be tagged to a customer, so nothing is owed by "someone".
Sell on deni
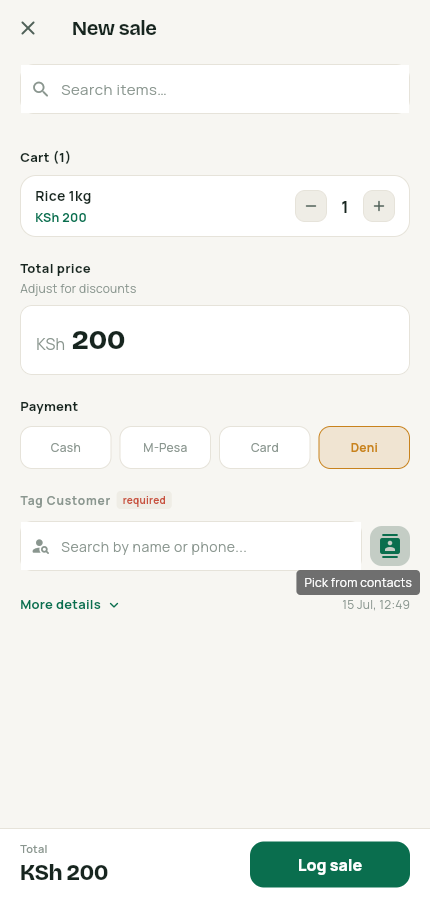
- In the sale screen, pick Deni as the payment. Tagging a customer becomes required.
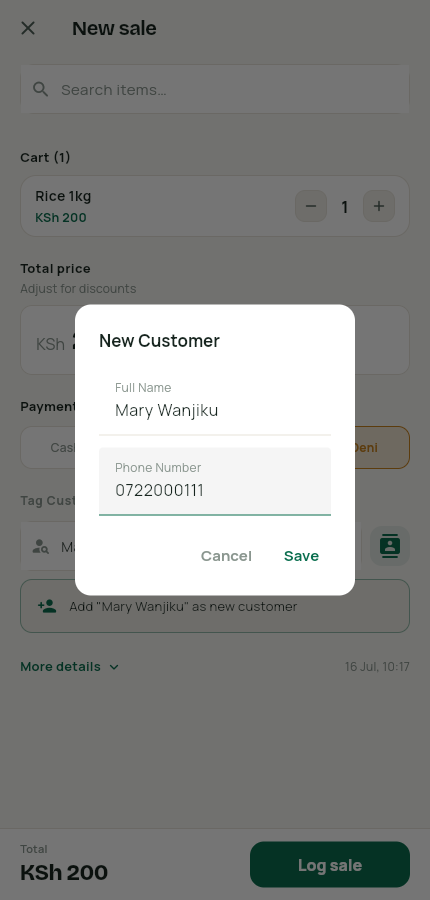
- Search the customer by name or phone. If they're new, tap Add as new customer — name and phone number are all it takes.
- Tap Log sale. The amount lands in Deni as outstanding under that customer.
Know your customers
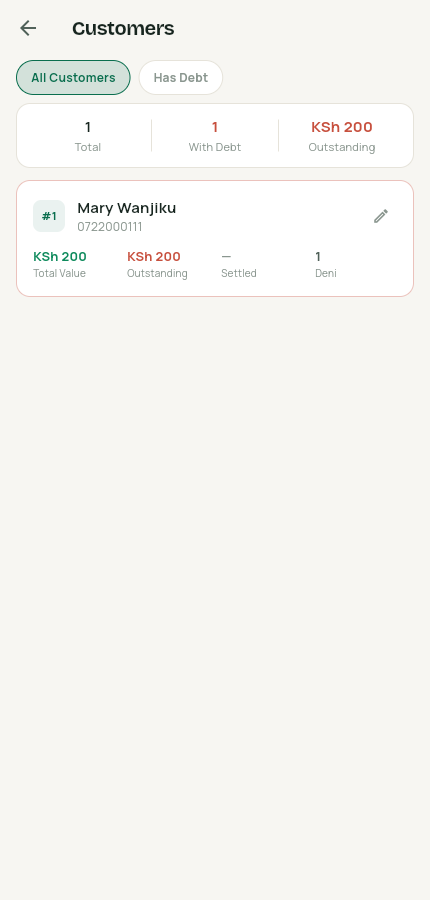
- Go to More → Customers for the full directory — filter to Has Debt when you're collecting.
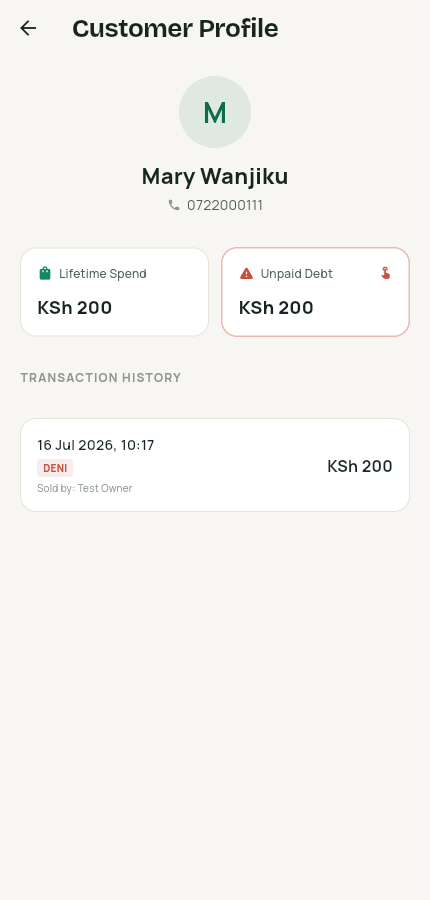
- Tap a customer for their profile: lifetime spend, unpaid debt and every transaction.
Settle a deni
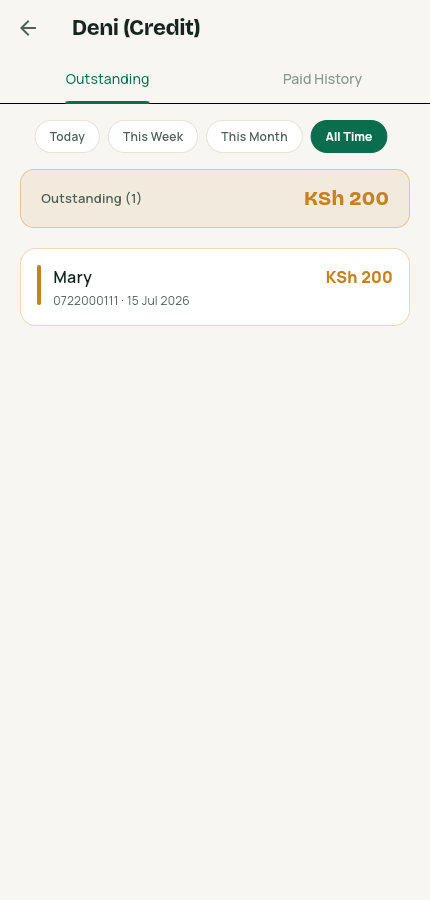
- Go to More → Deni. The Outstanding tab lists every unpaid debt with a running total.
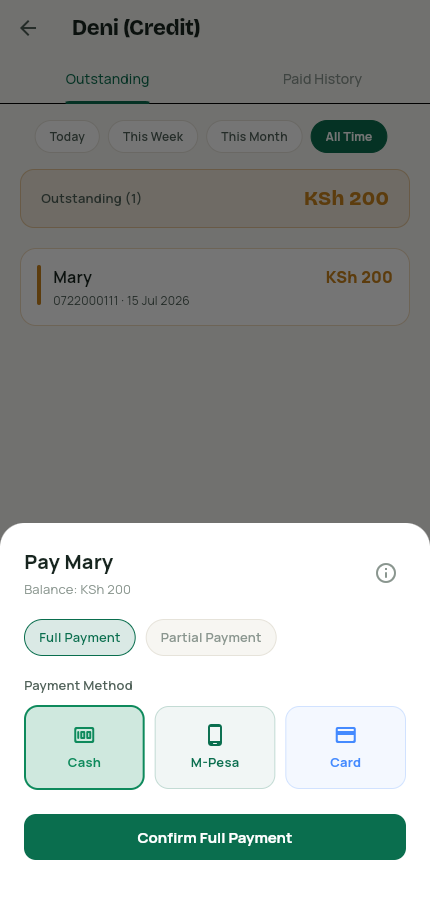
- Tap the debt, choose Full or Partial payment and how they paid.
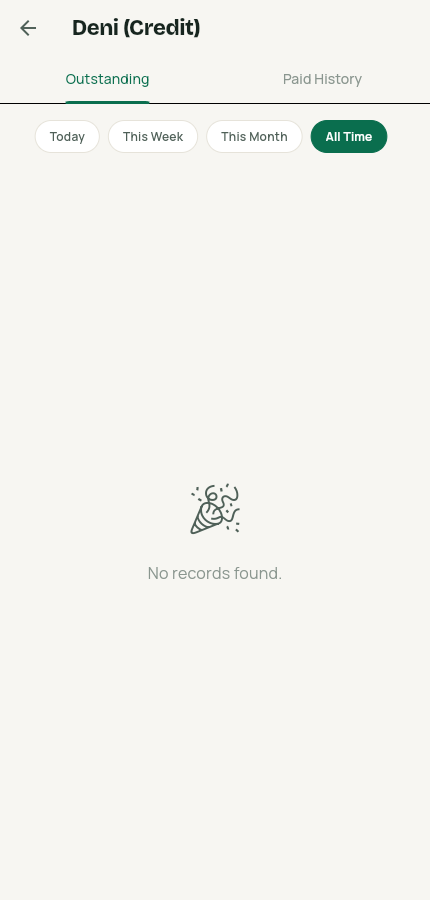
- Tap Confirm. Settled debts move to Paid History.
Expenses
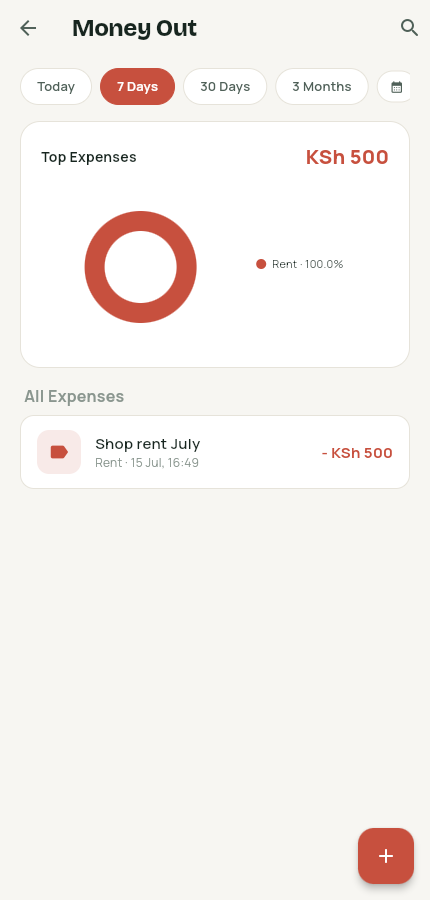
Money out gets recorded next to money in, so profit is real — not revenue wearing a disguise.
Add an expense
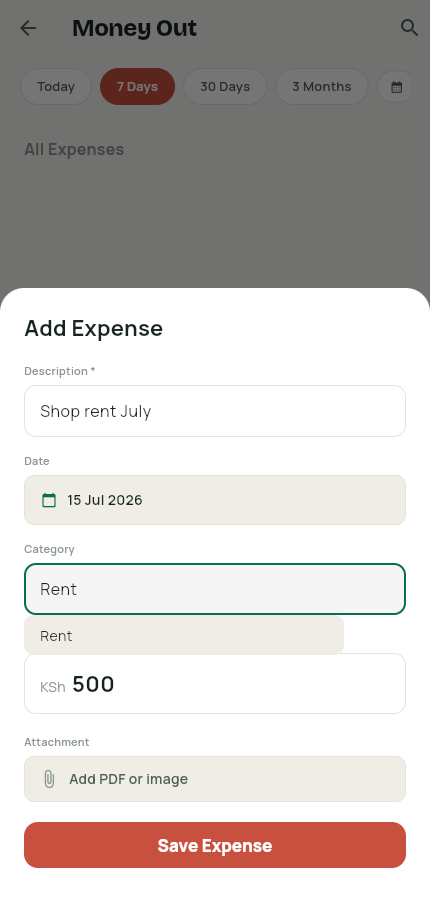
- Go to More → Expenses and tap the + button.
- Describe the expense and pick the date.
- Type the category — existing categories autocomplete, new ones are created as you type.
- Enter the amount, attach a PDF or photo if you keep receipts, and tap Save Expense.
Stock-take losses are posted here automatically under the "Stock Loss" category.
Reports
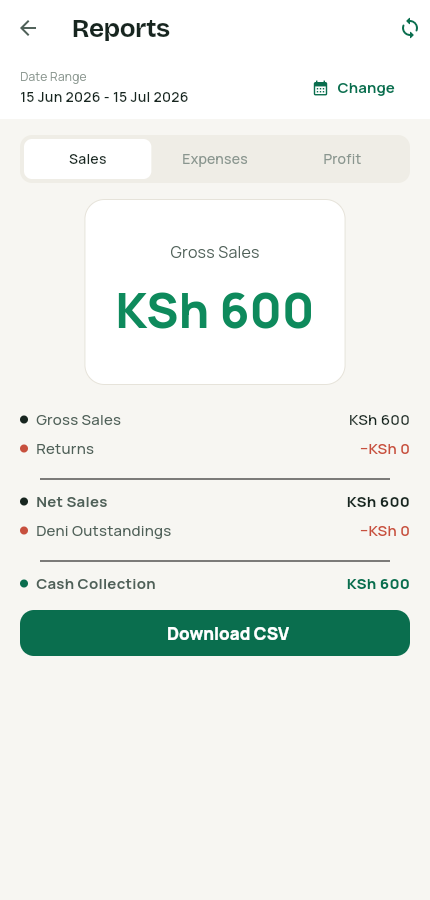
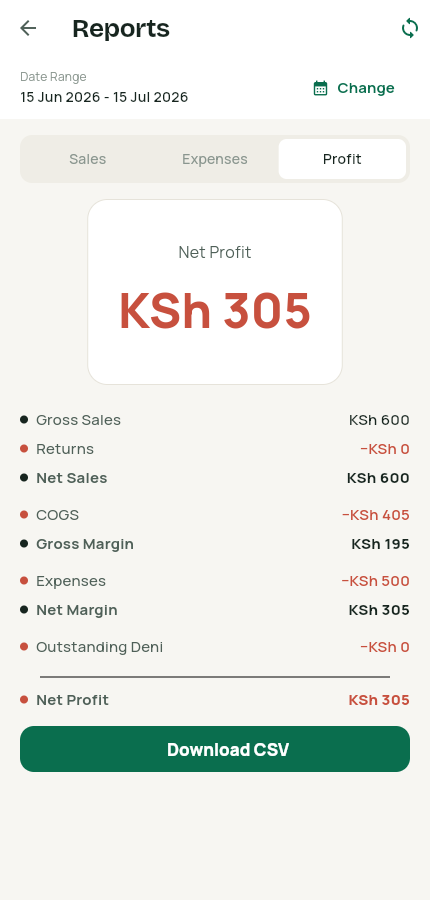
Three tabs — Sales, Expenses, Profit — over any date range, each exportable to CSV.
Read your numbers
- Go to More → Reports and set the date range with Change.
- Sales shows gross sales, returns, net sales, deni outstandings and actual cash collected.
- Profit works down from net sales through cost of goods and expenses to net profit.
- Tap Download CSV to share any tab with your accountant.
Stock take
Count the shelf, compare it to the system, and post the difference — losses become expenses, and inventory is corrected in one atomic step. Owners and co-owners can initiate one.
Start a stock take
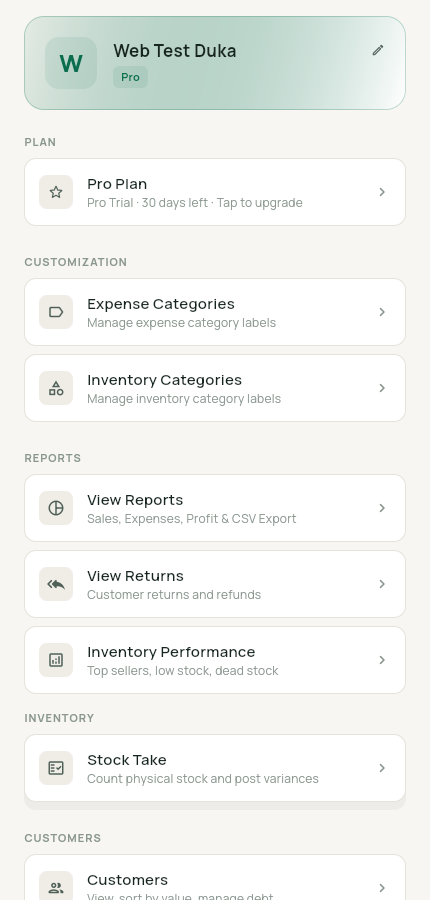
- Go to More → Settings → Stock Take, then tap New Stock Take.
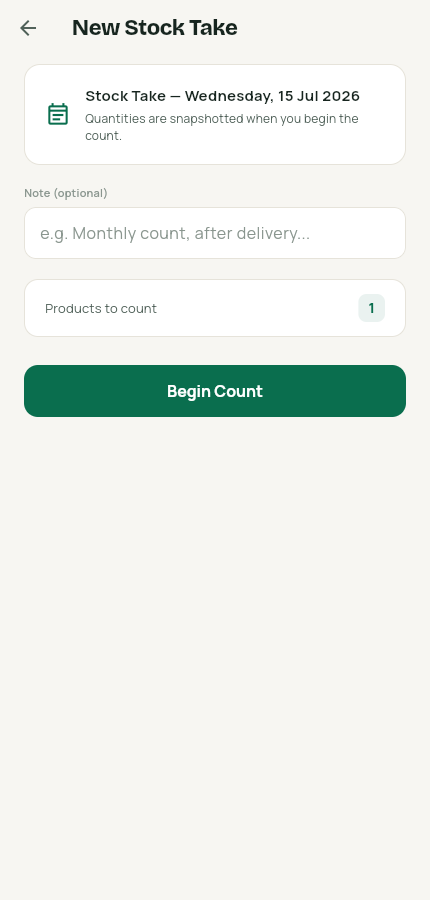
- Add a note if you like — system quantities are snapshotted the moment you begin.
- Tap Begin Count.
Count and review
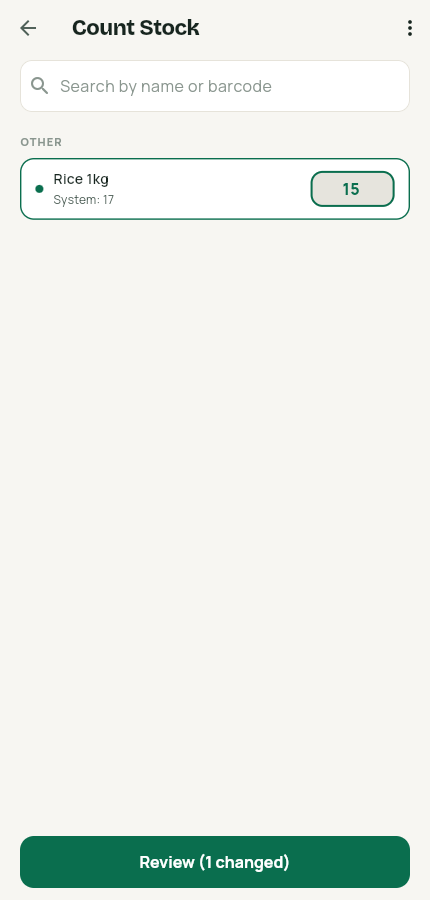
- Type the counted quantity next to each item. Counts save as you go — a draft survives even if the app closes.
- Changed rows get a green mark, and the button becomes Review (N changed).
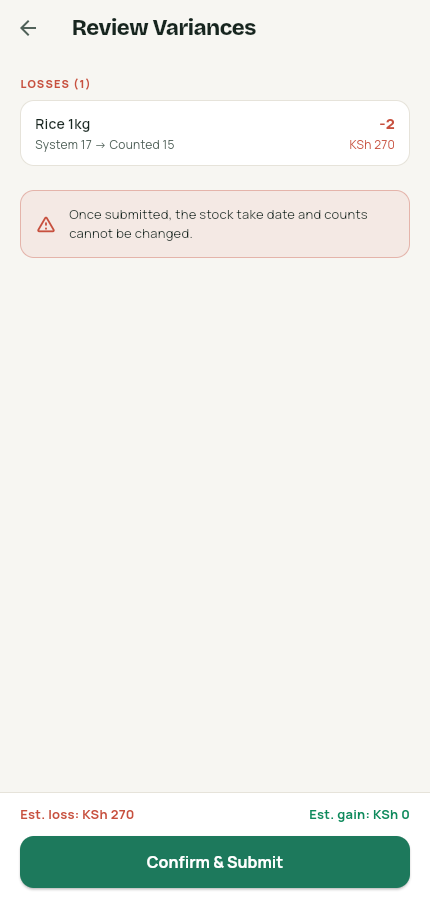
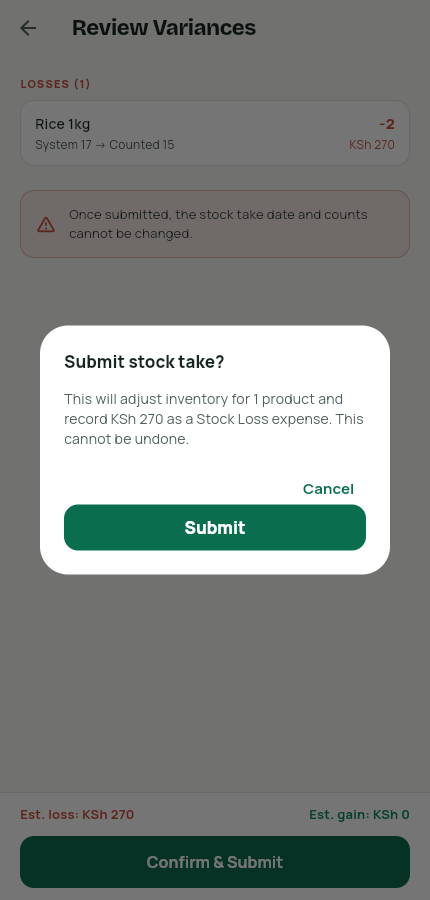
- The review screen lists only variances: losses in red, gains in green, each valued in shillings.
Submit and see the effect
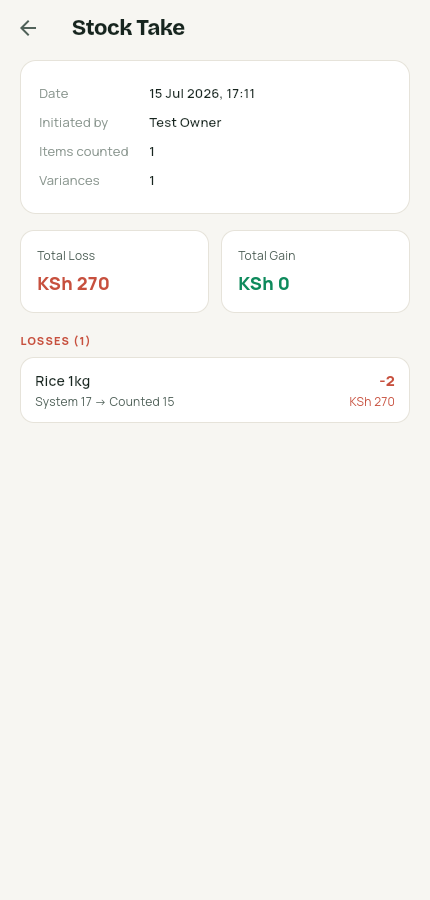
- Tap Confirm & Submit and read the summary — once submitted, the date and counts are frozen.
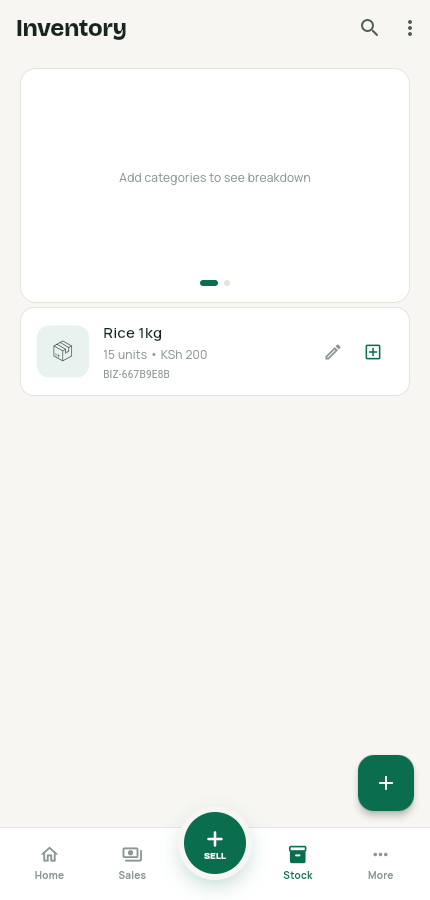
- Inventory is corrected to the counted quantities, and each loss is posted as a Stock Loss expense.
- Past stock takes stay available, read-only, in the history.
A stock take works fully offline and syncs as one atomic operation when you're back online.
Returns
A return puts the items back in stock and takes the refund out of revenue — no side-notes needed.
Process a return
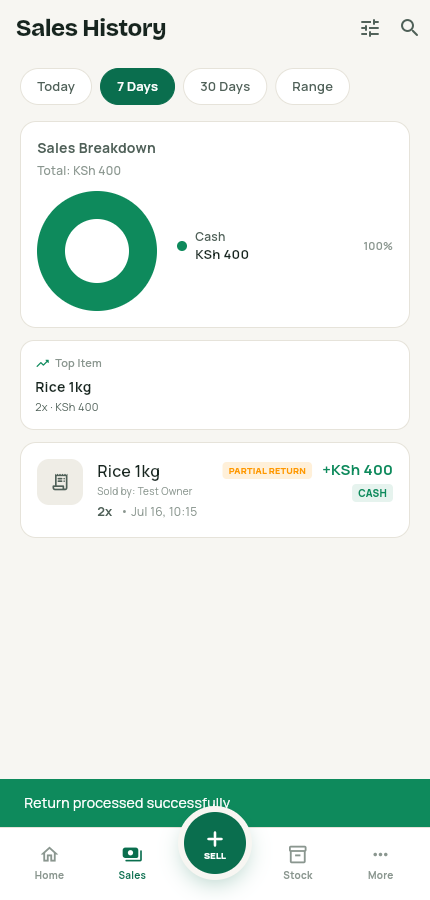
- Open the sale from Sales history and tap Return / Refund Item(s) on the receipt.
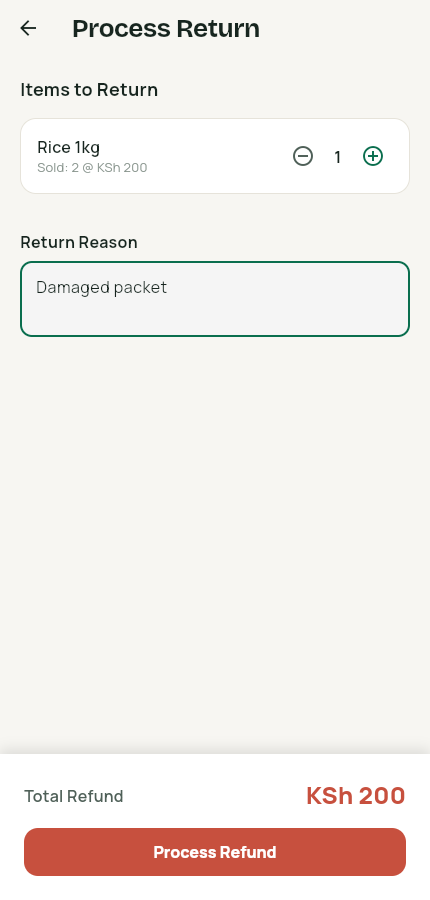
- Set how many of each item are coming back — the refund total updates as you do.
- Write the reason and tap Process Refund.
- The sale keeps a Partial Return badge, and the items go back into stock.
Review refunds
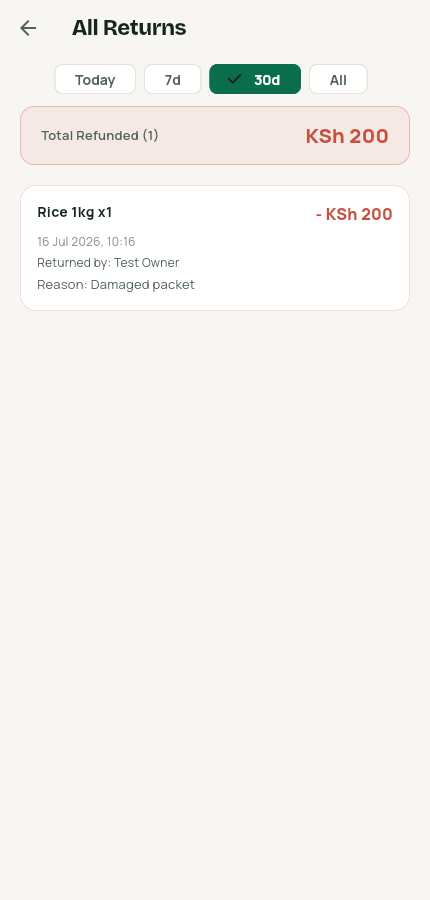
- Go to More → Returns for every refund with who processed it and why.
- Filter by Today, 7 days, 30 days or All — the Total Refunded banner keeps the sum in view.
Pre-orders & holds
Hold items for a customer without touching stock — the sale happens when they collect.
Create a hold
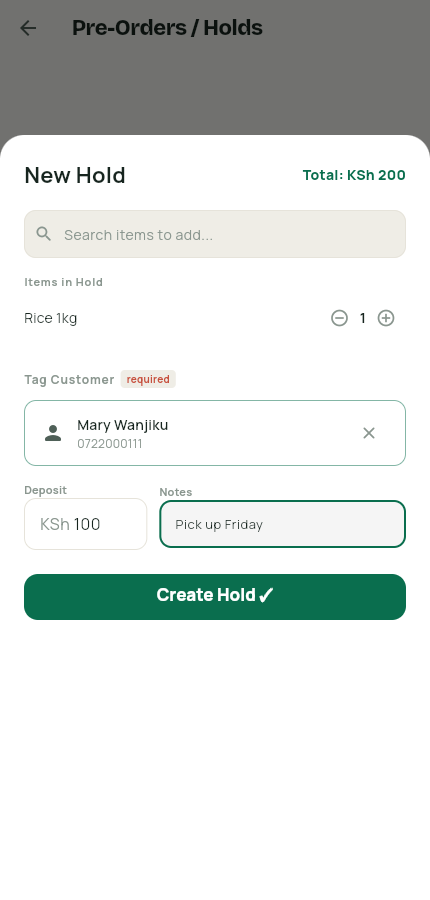
- Go to More → Pre-orders and tap New Hold.
- Search and add the items, then tag the customer — holds always have a name on them.
- Record any deposit and add a note like the pickup day.
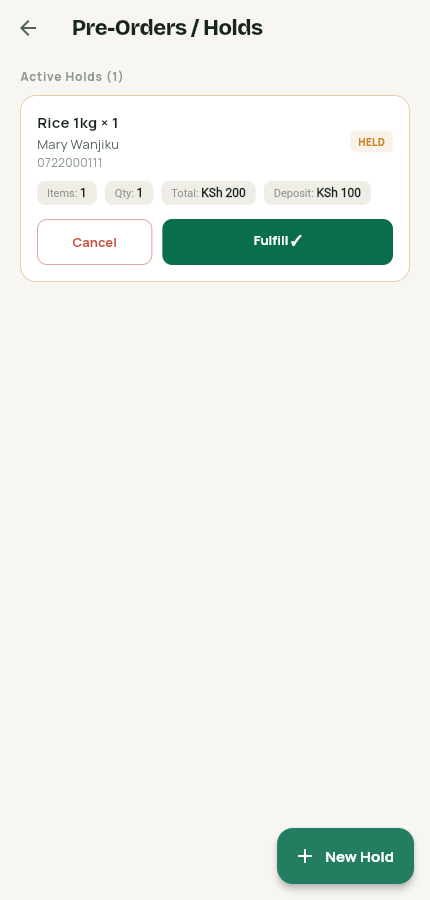
- Tap Create Hold. The hold sits in Active Holds until you Fulfill it (which completes the sale and deducts stock) or cancel it.
Staff
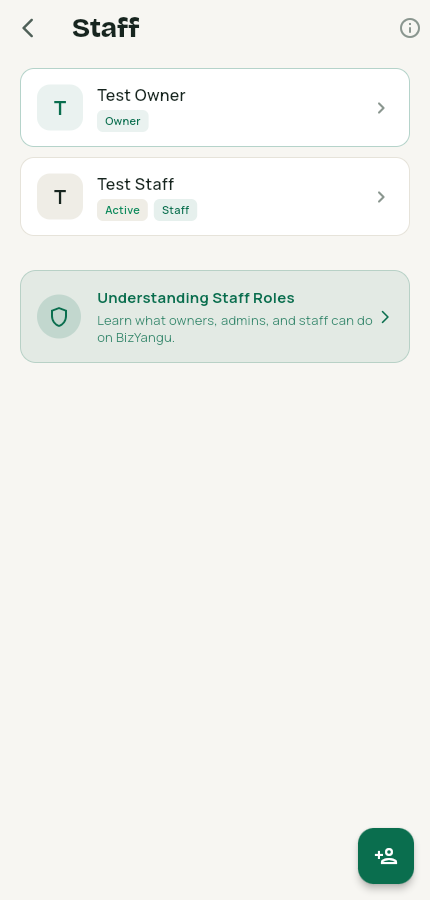
Everyone gets their own PIN and exactly the access their role needs — owners see everything, staff log sales.
Invite a staff member
- Go to More → Staff and tap the invite button.
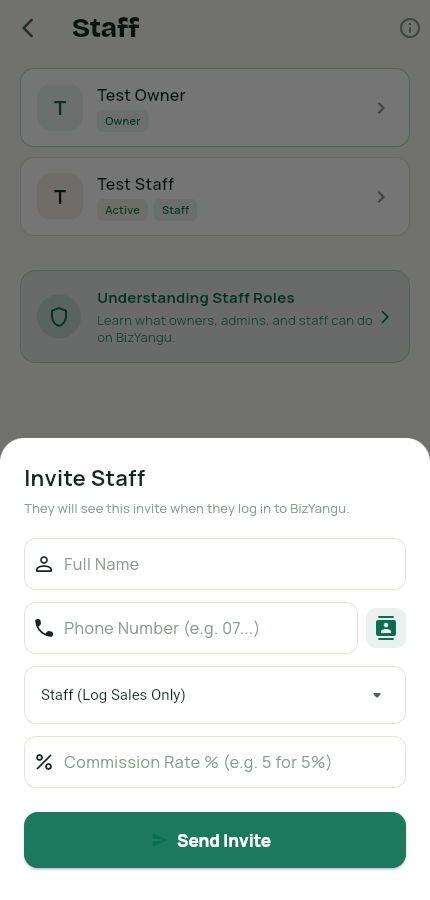
- Enter their name and phone number, and pick the role — Staff logs sales, Admin also manages stock and customers.
- Set a commission rate if they earn one, then tap Send Invite.
- They'll see the invite when they log in to BizYangu with that phone number.
Every sale records who made it, so commissions and rankings take care of themselves.